Knitting machine hacking: putting it all together
May 29, 2015
Previous knitting machine hacking posts: introduction, flashing the Arduino firmware
Thankfully, after the complicated process I went through getting my Arduino set up to work with the AYAB shield, actually connecting everything to the knitting machine was straightforward!
The video from AYAB showing how to open up your knitting machine and connect your Arduino is great and very clear. I had to snip a cable tie to get enough slack in some of the cables and remove a plastic clip from one of the connectors to get it to fit when connected to the shield, but it all worked out fine.
Since my knitting machine has a broken card reader anyway, I didn’t bother keeping it. I did keep the plastic outer case, but removed the electronics and display, which were just attached with a few screws. The empty space created is big enough to fit the Arduino and shield (though I have to disconnect some cables from the Arduino), which makes it much easier to store everything.
I was dying to find out if this was all going to work and I couldn’t find documentation for the command line control utility (though I’ve since figured it out), so I used the AYAB GUI running in an Ubuntu virtual machine1.
It took a bit of experimentation to get the knitting process initialized correctly, but it totally worked! I was ridiculously excited at this point, as you might imagine. (And yes, I did need a new sponge bar for my machine, which is very often the case with used knitting machines. Thankfully I had a spare!)
I did a lot of testing and experimenting without yarn as I was getting the hang of using the AYAB GUI. You don’t need to have yarn in the machine to test the needle controls---you can run the empty carriage back and forth to try out the process first.
Two things to note about the GUI that I figured out through trial and error: it only supports PNGs (as far as I can tell? JPGs are included in the example files, but they did’t work for me), and the file width needs to be smaller than the number of needles you’ve selected to work with.
It works! Actual knitting!
Here it is, video evidence of my newly-hacked knitting machine in action. (Also including a cameo from my cat Abe, who loves all things yarn-y and was very curious about this strange noisy machine.)
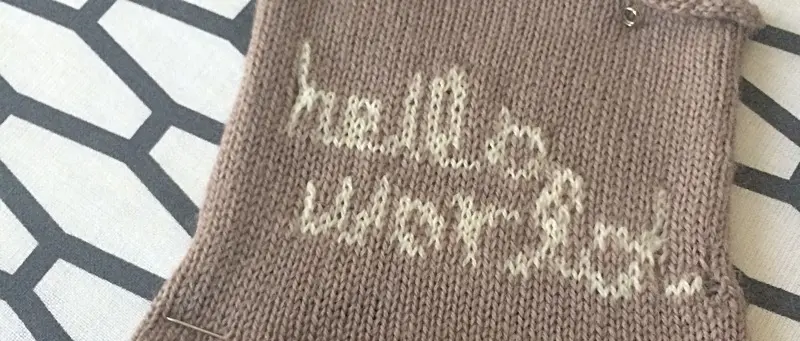
In case you couldn’t quite see what I knitted at the end of the video, here’s the source image (scaled up significantly; there is one pixel for each stitch so the original is 50 pixels wide):

And the finished product:
What’s next
Since I wrote most of this post (in February, whoops) I’ve acquired a ribber for my knitting machine, which is a second set of needles that creates a lot more possibilities for knitting images into fabric.
I’d also really like to write my own GUI for my machine, probably in Node with a web interface. I have some UI ideas brewing …
Footnotes
-
This worked fine using Parallels on my Mac; the only configuration neccessary is to tell Parallels to “pass through” the Arduino’s USB port to the VM from the Devices menu. ↩